Build a Next.js app to retrieve, display and update data in Strapi


What we build
We will build a simple Next.js app with a single page (the homepage). The homepage will display a list of to-dos and allow to tick them off as complete.
I will not go into writing tests in this entry. Feel free to check out the frontend repository for this series for the implementation including tests.
Let's get some structure in
Let's structure the way the frontend will work a little bit:
- There will be the homepage itself. It will be a Next.js page that will be rendered server-side. We will use
getServerSidePropstherefore to fetch the list of to-dos on the server and hand them over to the client as props. The homepage will then just be a React component that receives the props, keeps the to-do list in its state, manages updates to to-dos ( i.e., ticking them off as done) and renders to-dos. - To interact with Strapi, we will define two functions:
getAllToDosto fetch all to-dos from Strapi andupdateToDoto update a to-do in Strapi. The homepage will use these two functions:getAllToDoswill be called fromgetServerSideProps,updateToDowill be called client-side when a to-do is changed. - The actual rendering of the to-dos will be delegated to two components by the homepage:
ToDoListfor the overall list of to-dos andToDoEntryfor a single to-do in that list. To style these components, we will use Styled Components. - To let Strapi know about to-do updates, we will let events bubble up in the following
chain:
ToDoEntry -> ToDoList -> Homepage -> updateToDo. For further development, it would be neat to extract to-do management into a separate context, but let's keep it simple here.
Bootstrap the app
We are good to go. Let's go ahead and bootstrap the app. We will start by creating a new Next app with TypeScript
support. The app will be called to-do-frontend.
yarn create next-app --ts to-do-frontend
Switch into the to-do-frontend folder and install Styled Components:
yarn add styled-components
You should now have a basic Next.js app set up:
- pages
  - index.tsx     # our homepage
Define the data model
Let's kick off the implementation by defining what a to-do looks like for the frontend. Create a types folder in the
root of the frontend project and in it a file ToDo.ts:
export interface ToDo {
    id: number;
    Name?: string;
    Done?: boolean;
}
This interface defines a subset of the fields we have defined in Strapi before. Make sure to use the same names for the properties in TypeScript as you have used for the Strapi fields.
Implement the API
Now that we have defined the interface of a to-do, let's use it to actually fetch some data from Strapi.
Create a new file api/ToDoApi.ts:
import {ToDo} from "../types/ToDo";

export const BACKEND_URL =
    process.env.NEXT_PUBLIC_BACKEND_URL || "http://localhost:1337";

export const TO_DO_ENDPOINT = "/to-dos";

export function getAllToDos(): Promise<ToDo[]> {
    return fetch(`${BACKEND_URL}${TO_DO_ENDPOINT}`).then((result) =>
        result.json()
    );
}

export function updateToDo(id: number, toDo: ToDo): Promise<void> {
    return fetch(`${BACKEND_URL}${TO_DO_ENDPOINT}/${id}`, {
        method: "PUT",
        body: JSON.stringify(toDo),
        headers: {
            "Content-Type": "application/json",
        },
    }).then(() => {
    });
}
As you can see, we first define the basic information we need to call the Strapi REST API: We read the
BACKEND_URL from the environment and fall back to Strapi running on localhost. TO_DO_ENDPOINT is the path to the
given endpoint that we already tried in the previous post.
Now we add two functions. One to fetch all to-dos from the endpoint using a simple GET request. The other to update a
to-do by sending the updated to-do to Strapi in a JSON payload using PUT.
Your workspace should now look like this:
- api
  - ToDoApi.ts
- pages
  - index.tsx
- types
  - ToDo.ts
Implement the ToDoEntry component
Now that we implemented the basic connectivity with Strapi, we are ready to develop our UI components. Let's start with the one displaying a single to-do.
Create a new components folder and in it components/ToDoEntry.tsx:
import styled from "styled-components";
import {ChangeEvent} from "react";
import {ToDo} from "../types/ToDo";

const ToDoWrapper = styled.div`
  width: 100%;
  padding: 24px;
  background: #eee;
  border-radius: 12px;
  box-shadow: #ccc 2px 2px 3px;
  margin-bottom: 24px;
`;

const Checkbox = styled.input`
  margin-right: 12px;
`;

interface ToDoEntryProps {
   toDo: ToDo;
   uptdateToDoDoneStatus: (id: number, done: boolean) => void;
}

export default function ToDoEntry({
                                     toDo: {id, Name, Done},
                                     uptdateToDoDoneStatus,
                                  }: ToDoEntryProps): JSX.Element {
   return (
           <ToDoWrapper>
              <label htmlFor={`${id}`}>
                 <Checkbox
                         type="checkbox"
                         id={`${id}`}
                         checked={Done}
                         onChange={(e: ChangeEvent<HTMLInputElement>) =>
                                 uptdateToDoDoneStatus(id, e.target.checked)
                         }
                 />
                 {Name}
              </label>
           </ToDoWrapper>
   );
}
So, what happens here?
- We use Styled Components to style some basic UI elements that we will use in our `ToDoEntry´ component.
- We define the props that the component will receive: The actual to-do to render (
toDo) and a function to inform the outside world that thedonestate of the to-do has changed (uptdateToDoDoneStatus). - Finally, we implement the component itself. At the end, it's nothing more than a checkbox that calls
uptdateToDoDoneStatuswhen its checked state changes.
Implement the ToDoList component
We can display a single to-do now. Let's build the list component that renders an array of to-dos. To do so, create
components/ToDoList.tsx:
import {ToDo} from "../types/ToDo";
import ToDoEntry from "./ToDoEntry";

export interface ToDoListProps {
    toDos: ToDo[];
    uptdateToDoDoneStatus: (id: number, done: boolean) => void;
}

export function ToDoList({toDos, uptdateToDoDoneStatus}: ToDoListProps): JSX.Element {
    return (
        <>
            <h1>To-Dos</h1>
            {toDos
                .sort((t1, t2) => +(t1.Done || false) - +(t2.Done || false))
                .map((toDo) => (
                    <ToDoEntry key={toDo.id} toDo={toDo} uptdateToDoDoneStatus={uptdateToDoDoneStatus}/>
                ))}
        </>
    );
}
In this file, we
- Define the props of the to-do list. It's very similar to our
ToDoEntryProps, just that it accepts a list of to-dos rather than a single one. - Implement the list by sorting the to-dos by
Donestate (open to-dos come first, done to-dos come last). We make use of the nativesortfunction and just convertbooleanvalues tonumbers to make them usable forsort. Then the component renders aToDoEntryfor each to-do. We also pass theuptdateToDoDoneStatusfunction over toToDoEntryas it was passed toToDoList.
Your workspace should now look like this:
- api
  - ToDoApi.ts
- components
  - ToDoEntry.tsx
  - ToDoList.tsx
- pages
  - index.tsx
- types
  - ToDo.ts
Build out the homepage
We now have all foundational components in place we need to bring it all together on our page:
- We can fetch to-dos from Strapi using
ToDoApi, - we can render them using
ToDoListandToDoEntry, - we can bubble up an event when a to-do was set to done using the
uptdateToDoDoneStatuscallback.
Let's bring it all together in pages/index.tsx:
import type {GetServerSidePropsResult, NextPage} from "next";
import {useState} from "react";
import {ToDoList} from "../components/ToDoList";
import {ToDo} from "../types/ToDo";
import {getAllToDos, updateToDo} from "../api/ToDoApi";

interface HomepageProps {
    toDos: ToDo[];
}

export async function getServerSideProps(): Promise<GetServerSidePropsResult<HomepageProps>> {
    return {
        props: {
            toDos: await getAllToDos(),
        },
    };
}

const Home: NextPage<HomepageProps> = ({
                                           toDos: toDosFromProps,
                                       }: HomepageProps) => {
    const [toDos, setToDos] = useState<ToDo[]>(toDosFromProps);

    async function uptdateToDoDoneStatus(id: number, done: boolean): Promise<void> {
        const toDo: ToDo | undefined = toDos.find((toDo) => toDo.id === id);
        if (!toDo) {
            return;
        }

        const updatedToDo: ToDo = {
            ...toDo,
            Done: done,
        };

        setToDos((toDos) => [
            ...toDos.map((toDo) =>
                toDo.id === id && updatedToDo ? updatedToDo : toDo
            ),
        ]);
        await updateToDo(id, updatedToDo);
    }

    return <ToDoList toDos={toDos} uptdateToDoDoneStatus={uptdateToDoDoneStatus}/>;
};

export default Home;
Let's take the homepage step by step:
-
We define
HomepagePropsthat define which props theHomecomponent expects. We use theHomepagePropsboth for the argument of theHomecomponent and to shape the return type ofgetServerSideProps. -
We implement
getServerSideProps. As you can see, this function is expected to return aGetServerSidePropsResult, which we return in its most basic shape: An object with apropsproperty. Thispropsproperty will be handed over as an argument to theHomecomponent later by Next. As we defined inHomepageProps,propsneeds to have atoDosproperty (an array of to-dos). We populate this property using ourgetAllToDosAPI function that will fetch the to-dos from Strapi. -
As the final piece, we build the
Homecomponent, which is just a React component in the end. It receives the props fromgetServerSideProps, including the list of Strapi to-dos. It then puts the initial list of to-dos into a state to manage them.Next, we define
uptdateToDoDoneStatus, which will be called when the user ticks or unticks a to-do (remember, this one bubbles up all the way fromToDoEntry). In here, we first find the to-do to update. If it is not found for some reason, we return here already. Otherwise, we create the updated to-do, which consists of the original to-do with the newdonestate.We then use this updated to-do to update the local state and to call our
updateToDoAPI function to let Strapi know about the update.
Give it a spin
Now that we completed the implementation, let's check out the whole package.
First, start Strapi (if it is not running already) by running yarn develop in your backend folder.
Next, start the Next app using yarn dev in your frontend folder.
Once everything is running, open http://localhost:3000/ in your browser and test your brand-new to-do app:
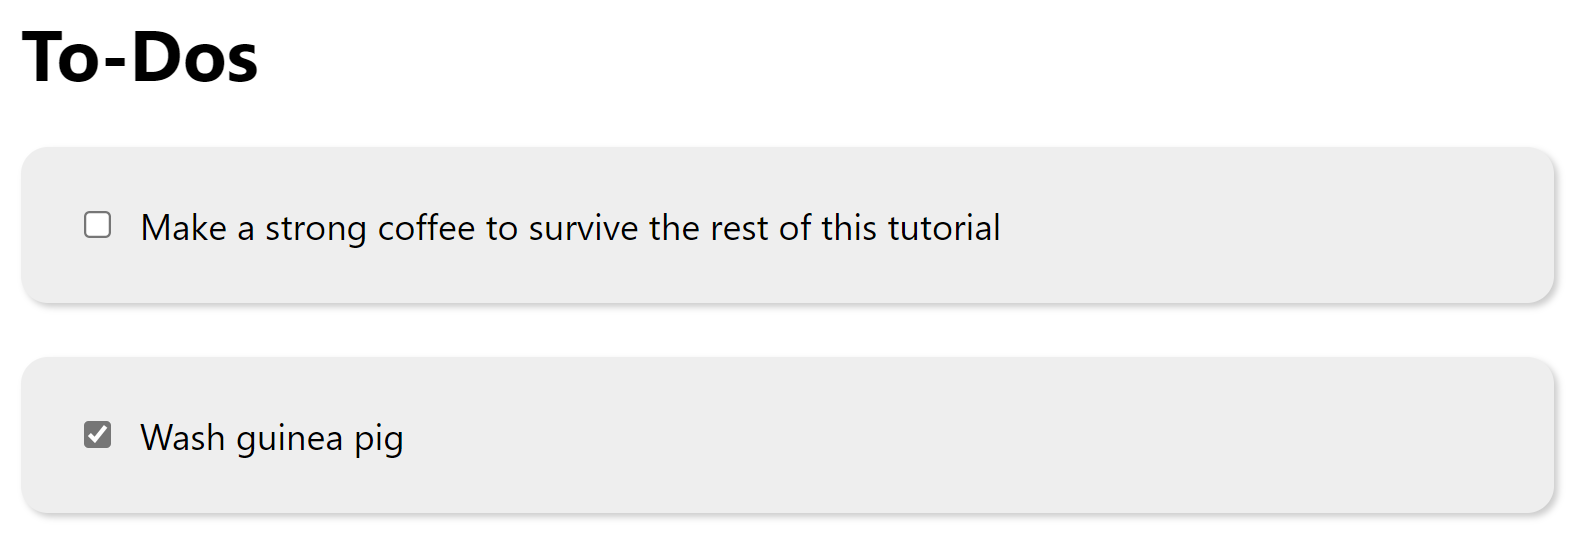
Tick and un-tick the to-do. Try to create new to-dos in Strapi and verify they appear here. If you feel like tweaking the app a little more, you could nicely start by implementing the possibility to add new to-dos.
Next steps
In the future, we might go ahead and extend the app with the possibility to log in, assign to-dos to users and see your own to-dos in the app. Also, it would be neat to use Next.js API routes to not access Strapi directly, but cover up the endpoints with Next.js routes.
However, this and the few previous post should already provide an overview of how easily apps, including backend and frontend, can be built using a combination of Strapi and Next.js.